Last updated October 30, 2026
DIY vs Professional Insulation: The San Bernardino Homeowner’s Decision Guide
Here’s a stat that should make every San Bernardino homeowner pause: the California Energy Commission estimates that improperly installed insulation can reduce its effective R-value by up to 50%. In a city where summer temperatures regularly cross 100°F for weeks at a time, that’s not a minor inefficiency. That’s your air conditioner running a marathon every afternoon while your walls and attic quietly leak the cool air you’re paying for. This guide maps exactly where DIY insulation makes sense in San Bernardino, where it becomes a liability, and how to tell the difference before you climb into an attic that’s been baking in the Inland Empire sun all day. For more guides & resources on keeping your home efficient, explore our blog.
Quick Answer
Most DIY insulation in San Bernardino is reasonable only for small, accessible jobs: adding unfaced batt insulation over existing attic material, weatherstripping, or sealing visible gaps around pipes and vents. Spray foam, whole-attic air sealing, wall cavity retrofits, and any project touching California Title 24 compliance should be handled by a professional. If you’re unsure where to start, see our guide on How to Hire a Insulation Contractor in San Bernardino: A Step-by-Step Guide. The honest test: if your project involves removing old material, opening walls, or working in an unconditioned attic during summer, the liability and permitting consequences usually erase whatever you’d save on labor.
Table of Contents
- The Real Cost of DIY Insulation in San Bernardino
- What DIY Insulation Actually Works (And What Doesn’t)
- Why Spray Foam Is Never a DIY Project in California
- Title 24, Permits, and Your Insulation Project
- The Hidden Cost Model: Does DIY Actually Save Money?
- The Middle Path: Prep Work You Can Do Yourself
- Common Mistakes to Avoid
- When to Call a Professional
- Frequently Asked Questions
- The Bottom Line
The Real Cost of DIY Insulation in San Bernardino
Let’s start with the number everyone wants: how much does insulation actually cost in San Bernardino? Professional blown-in attic insulation in this market typically runs $1.50 to $3.50 per square foot installed, depending on material and existing conditions. DIY batts from a big-box store run $0.60 to $1.20 per square foot for material alone. On paper, DIY looks like it saves 50-60%. Reality tends to disagree.
Here’s what the material cost doesn’t account for. A typical 1,500-square-foot attic in San Bernardino’s older housing stock, think the neighborhoods around Arrowhead or the postwar tracts near Highland Avenue, rarely has the flat, unobstructed layout that makes batts a simple drop-in job. You’ll find recessed lights, bathroom fans, cross-bracing, and decades of accumulated dust. Each obstruction is a place where a batt gets compressed, cut wrong, or left with a gap. Compressed fiberglass loses R-value proportionally. A batt squeezed from 13 inches to 6 inches doesn’t perform like R-38. It performs closer to R-19, and that’s before accounting for air movement through the gaps you missed.
Then there’s the San Bernardino-specific factor that most online guides ignore: summer attic temperatures. An unconditioned attic in this city hits 140-150°F from June through September. That’s not a comfortable workspace. That’s a heat-exhaustion risk. Working in those conditions, even in the early morning, means you’re moving slower, making more mistakes, and rushing to get out. For tips on staying safe, read our Insulation Emergency Preparedness Guide for San Bernardino Homes. Every mistake is a thermal bypass that stays in your home for decades.
Key takeaways:
- Material cost is not project cost. Factor equipment, mistakes, and time.
- Compressed or gapped insulation loses up to half its rated R-value.
- San Bernardino’s summer attic conditions make DIY installation slower and more error-prone.
- Older San Bernardino homes rarely have the simple attic geometry that makes DIY straightforward.
What DIY Insulation Actually Works (And What Doesn’t)
We’re not here to tell you every insulation project needs a professional. That’s not true, and pretending otherwise would be dishonest. We’ve been in enough San Bernardino attics to know that some jobs genuinely are DIY-appropriate, provided you understand the scope and your own limits. The line between “reasonable weekend project” and “hidden liability” comes down to accessibility, existing conditions, and whether the job touches air sealing.
Here are the three tasks where DIY insulation is genuinely reasonable in Southern California:
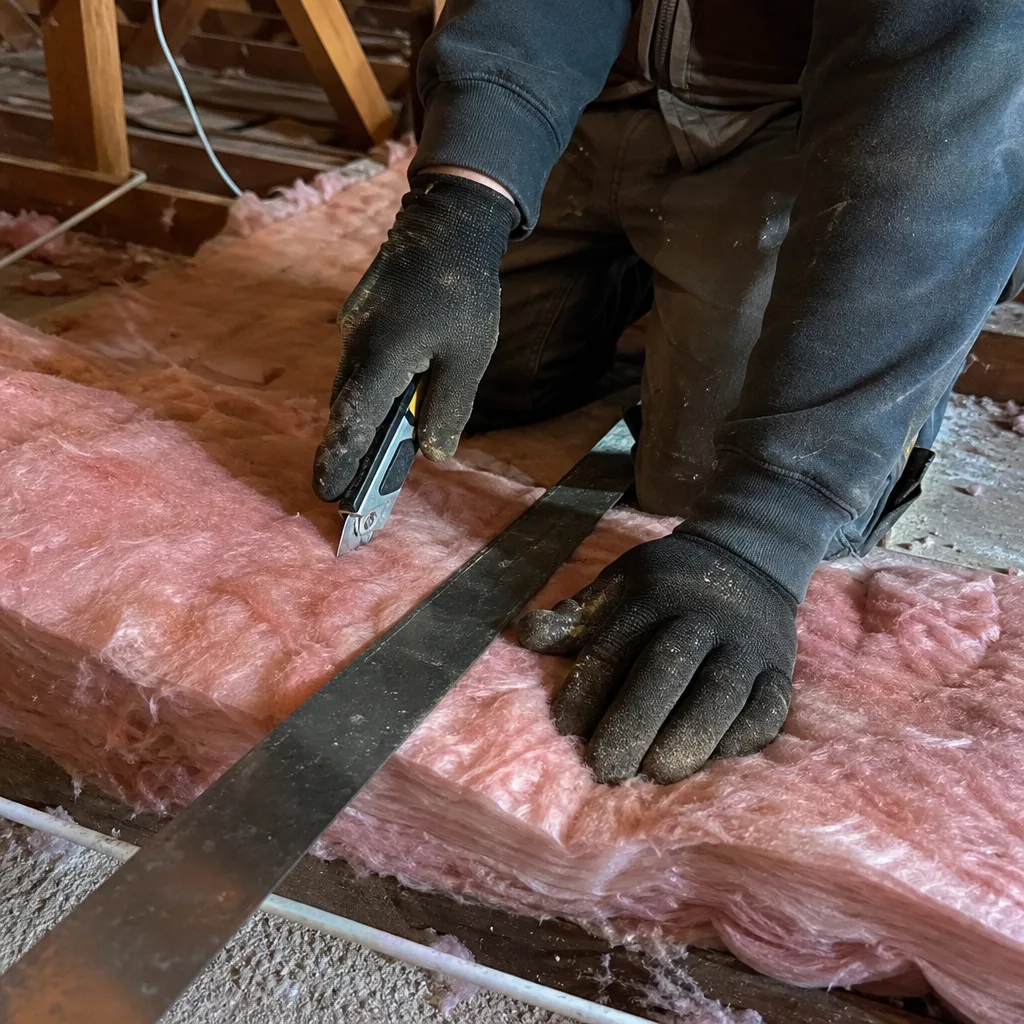
- Adding unfaced batts over existing insulation. If you already have blown-in or batt insulation that’s settled but intact, adding a second layer of unfaced fiberglass batts on top is straightforward. The key word is “unfaced” – a vapor barrier in the wrong place traps moisture against your ceiling drywall, and in San Bernardino’s climate, that means mold. This job requires a utility knife, a straightedge, knee boards, gloves, a respirator, and honestly, about four to six hours for a typical attic.
- Sealing visible gaps around penetrations. Where plumbing vents, electrical wires, and recessed light housings poke through the ceiling plane into the attic, you’ll find air leaks. Sealing these with caulk or expanding foam from the attic side is doable for a careful homeowner. It’s tedious. It’s also one of the highest-impact improvements per dollar you can make. Just stay off the joists if you’re not sure of your footing, and never seal the attic-side of a recessed light that isn’t rated for insulation contact.
- Weatherstripping the attic access hatch. The pull-down stair or hatch into your attic is a huge air leak in most homes. Installing foam weatherstripping around the perimeter and adding a rigid foam cover on the attic side takes an hour and costs under $50. It’s the single best DIY insulation project in terms of effort-to-payoff ratio.
What does not make the list: removing old insulation, installing spray foam, working in wall cavities, or any project that involves a vapor barrier decision. Those require a professional attic insulation evaluation in San Bernardino because the failure modes are expensive and often invisible for years.
Why Spray Foam Is Never a DIY Project in California
You can buy DIY spray foam kits at home improvement stores. You can watch videos of people installing spray foam in their attics. Let’s be direct: spray foam is categorically not a DIY product, and in California, the reasons go well beyond quality concerns.
Spray foam is a two-component chemical reaction. The A-side, isocyanate, and the B-side, polyol resin, must mix at an exact ratio under exact temperature and pressure conditions. Off-ratio foam doesn’t cure correctly. It can off-gas for months, fail to adhere to the substrate, or shrink away from framing members, leaving a gap exactly where you don’t want one. The temperature window matters too. In a San Bernardino summer attic, surface temperatures can exceed the manufacturer’s maximum application temperature by 30 degrees. Professional crews work around this with conditioned equipment and scheduling. A DIY kit doesn’t have that flexibility.
Then there’s the regulatory layer. California’s building code treats spray foam installation as work that requires specific fire-barrier and thermal-barrier coverage once installed. Self-installed foam in a living space without the proper intumescent coating or thermal barrier is a code violation. When you go to sell the home, a sharp home inspector flags it, and now you’re paying double: once to remove the DIY foam and once to have it properly installed. We’ve seen this exact scenario play out in San Bernardino transactions, and it’s never a cheap fix.
The warranty issue matters too. Manufacturers like Icynene and Demilec extend product warranties only when the foam is installed by an approved, trained contractor. DIY foam carries no manufacturer warranty. If the foam shrinks, fails to cure, or doesn’t deliver the stated R-value, you have no recourse. Companies like Comfort Zone Insulation Co install spray foam systems from Icynene and Demilec specifically because those manufacturer partnerships mean the warranty is enforceable and the installation meets California code. That’s not marketing. That’s the difference between a protected investment and an uninsurable bet.
What a San Bernardino homeowner should know about DIY spray foam:
- Off-ratio mixing creates uncured foam that can off-gas volatile compounds into living spaces.
- California code requires thermal barriers over exposed foam in occupied and storage areas.
- No manufacturer warranty applies to self-installed foam.
- Removal of failed DIY foam often costs more than the original professional installation would have.
- Ventilation during and after installation is a health consideration, not a suggestion. Professional crews use supplied-air respirators and containment. A paper mask is not adequate protection.
For homeowners considering spray foam insulation in San Bernardino, the material selection alone, open-cell vs. closed-cell, R-value targets, moisture management, is a design decision that should be made by someone who installs these systems daily. The right product for a San Bernardino attic might not be the right product for a Riverside crawl space. Having access to multiple brands, including Icynene open-cell and Demilec closed-cell systems, means the recommendation is driven by your home’s conditions, not by whatever’s in stock.
Title 24, Permits, and Your Insulation Project
California’s Title 24 energy code isn’t a suggestion. It’s the legal minimum for energy performance in any permitted renovation, and insulation is one of the most heavily regulated components. Here’s what San Bernardino homeowners need to understand before they decide between DIY and professional installation.
If you’re adding insulation as a standalone project, meaning you’re not pulling permits for any other work, most California jurisdictions do not require a separate insulation permit. The work itself can technically be done without city oversight. But “technically legal to do without a permit” is not the same as “smart to do without documentation.” Here’s where self-installed insulation creates problems later:
Home sale disclosures. California’s residential disclosure requirements ask sellers about insulation type, depth, and installation date. If you can’t document what’s in your attic, when it went in, and at what R-value, the buyer’s inspector will note it. In a hot San Bernardino market, that’s a negotiation point against you. In a slow market, it’s a deal-killer. Professional installation comes with documentation: what material, what R-value, what coverage area, installed by whom. That documentation travels with the home.
Refinance appraisals. An increasing number of refinance appraisals in California include an energy component. Attics with poorly documented, sub-code insulation get flagged. You’re not just losing comfort value. You’re potentially leaving equity on the table.
Rebate eligibility. This is the one that catches people off guard. Southern California Edison and local utility programs offer insulation rebates, often $0.15 to $0.25 per square foot for qualifying projects. Those rebates generally require professional installation by a licensed contractor with documentation. The rebates, combined with the efficiency difference between professional and DIY installation quality, often close the cost gap significantly. A homeowner who installs their own batts saves on labor but forfeits hundreds in rebates and gets a lower-performing result. The math gets ugly when you look at it honestly, and we’ll walk through that math next.
The Hidden Cost Model: Does DIY Actually Save Money?
Let’s build a real comparison for a typical 1,500-square-foot San Bernardino home with a 1,200-square-foot attic. This is the house type we see all over this city, from the foothills to the older central neighborhoods.
The DIY scenario:
- Unfaced R-38 fiberglass batts for 1,200 square feet: roughly $1,000 to $1,400 at current big-box pricing.
- Safety equipment, knee boards, utility knives, sealant, respirator filters: $150 to $300.
- Time investment: two full weekends in a 140°F attic, or longer if you’re working solo in the early-morning hours.
- Assume 30% effective performance loss from imperfect installation (gaps, compression around framing, missed penetrations). That’s a generous assumption for first-time installer quality.
- No rebate eligibility.
- No documentation for resale.
- No removal of old material, meaning you’re layering over whatever was there before, including any old rodent damage or moisture issues you can’t see.
The professional scenario:
- Blown-in insulation in San Bernardino for the same attic, installed to R-38, typically runs $3,500 to $5,500 depending on material choice. Using GreenFiber cellulose, which is a recycled-content product that performs well in our climate, tends to land in the middle of that range. Using Owens Corning fiberglass blown-in might land lower. Both are options we install.
- Includes air sealing around penetrations before installation, the step most DIY projects skip entirely and the step that delivers the largest comfort benefit.
- Includes removal or leveling of old material where needed.
- Rebate eligibility of roughly $200 to $400 on a project this size.
- Documentation for resale, with brand, R-value, and coverage noted.
- Installed in one day by a crew that isn’t fighting heat exhaustion.
The honest math: DIY “saves” $2,000 to $3,500 upfront. But it delivers a system that performs 30% worse, forfeits rebates, creates no documentation trail, and costs you two weekends of dangerous work. If your cooling bill is $250 a month during San Bernardino’s long summer, a 30% performance shortfall on your attic insulation translates to meaningful annual losses, often $200 to $400 per year. Over the 20-year life of the insulation, the DIY project doesn’t save money at all. It costs more, it just costs it in small installments on your utility bill, and in one large installment when you sell.
This is the calculation most guides won’t show you. The sticker price of DIY looks better. The total cost of ownership does not.
The Middle Path: Prep Work You Can Do Yourself
There’s a version of this project that most comparison guides miss entirely. You don’t have to choose between doing everything yourself and paying someone to do everything. We regularly work with San Bernardino homeowners who want to reduce their project cost by handling the parts of the job that are actually labor-intensive but low-skill.
Here’s what that looks like in practice:
- Clear the attic access path. Move boxes, holiday decorations, and anything stored near the hatch or along the work path. A clear attic means the install crew works faster, and faster means less labor cost.
- Remove old batt insulation. If your existing insulation is batt material in reasonably good condition (no rodent activity, no moisture damage), you can remove it yourself. Wear a proper respirator, gloves, and full-coverage clothing. Bag the material and set it outside for pickup. This is time-consuming work that doesn’t require technical skill, and doing it yourself can reduce your professional quote meaningfully.
- Do your own visual inspection. Before you call anyone, climb up, take photos, and look for obvious problems: water stains on the ceiling deck, dark spots indicating air leaks, rodent droppings, old wiring that looks questionable. The more information you can provide during an estimate, the more accurate the quote.
- Seal obvious gaps before installation day. The caulk-and-foam work around visible penetrations is genuinely DIY-friendly, as covered earlier. Just confirm with your installer that you haven’t sealed anything that needs to stay accessible.
This middle path works best when you think of the division of labor like this: you handle the laborious, time-consuming, low-risk work. The insulation specialist handles the technical installation, the material selection, the air-sealing strategy, and the code compliance. We install insulation and nothing else. That’s not a limitation, it’s the reason we can tell you exactly what your attic needs without guessing.
The material selection piece matters more than most people expect. A home in the hills east of downtown San Bernardino has different moisture and fire considerations than a home in the flatlands near the 215. Attic insulation in San Bernardino isn’t one-size-fits-all, and having access to Johns Manville fiberglass, Knauf mineral wool, and GreenFiber cellulose means the recommendation fits your specific situation rather than a single product line the installer happens to carry.
Common Mistakes to Avoid
- Installing a vapor barrier in the wrong place. In San Bernardino’s climate, vapor barriers in attics often do more harm than good. A faced batt installed faced-side-down against the ceiling traps moisture against the drywall from the living space below. If you’re adding a second layer, use unfaced material, period.
- Blocking soffit vents with insulation. Your attic needs airflow from the soffits to the ridge or gable vents. Burying the soffits under new insulation stops that airflow, and the result is a hotter attic and moisture problems. In San Bernardino’s summer, a blocked soffit means your attic becomes an oven that radiates heat into your living space all night.
- Compressing insulation to fit around obstructions. Fiberglass and mineral wool work by trapping air in tiny pockets. Compress the material and you eliminate the air pockets. A compressed batt is a failed batt, even if it looks installed correctly.
- Ignoring the air-sealing step entirely. This is the biggest one. Insulation slows conductive heat transfer. It does not stop air movement. In a San Bernardino summer, the pressure difference between your air-conditioned interior and the superheated attic pulls attic air through every unsealed penetration. Insulation without air sealing is like a winter coat with the zipper open. We see this exact issue in homes all over this city, and it’s the number-one reason a “newly insulated” attic doesn’t deliver the comfort or bill reduction the homeowner expected.
- Assuming old insulation can just be covered. Sometimes yes, sometimes no. If the old material shows water stains, rodent contamination, or is compressed to half its original depth, it needs to come out first. Covering it preserves the problem underneath a fresh layer.
- Working alone in a hot attic. This is a safety issue, not a quality issue. Heat exhaustion sets in fast at 140 degrees. If you insist on doing attic work yourself in summer, start at dawn, work with a partner on the ground, and stop at the first sign of dizziness or nausea. It’s not worth the hospital visit.
- Using faced batts against a kneewall or cathedral ceiling without understanding the moisture dynamics. These are the installations where DIY mistakes become invisible problems for years. If you’re unsure how moisture moves through your specific assembly, you’re guessing. And guessing wrong means mold.
When to Call a Professional
Some situations simply shouldn’t be handled from a ladder and a YouTube tutorial. If any of these apply, call before you climb:
- You need to remove existing insulation that’s contaminated, wet, or hosting rodents.
- You’re considering any type of spray foam, open-cell or closed-cell.
- Your walls need insulation retrofitted, which means drilling and filling from the exterior or interior, a job that requires specialized equipment.
- You’re planning a renovation that requires Title 24 documentation or will be inspected.
- Your home has known or suspected air-sealing issues you can’t identify yourself.
- You’re buying or selling and need documented insulation work for the transaction.
Comfort Zone Insulation Co offers free estimates in San Bernardino, and we mean free. No pressure, no obligation, just a clear assessment of what your home needs and what it doesn’t. Call (855) 341-7856 if you want a straight answer about your specific situation.
Frequently Asked Questions
Professional blown-in attic insulation in San Bernardino typically runs $1.50 to $3.50 per square foot, so a 1,200-square-foot attic runs roughly $1,800 to $4,200 depending on material, existing conditions, and whether air sealing is included. Spray foam runs higher, often $3.50 to $7.00 per square foot depending on open-cell versus closed-cell and depth. Call (855) 341-7856 for an exact quote on your specific home since estimates are free.
Upfront, yes. Material for DIY batt insulation runs about 50-60% less than professional installation. Over the life of the insulation, factoring in performance loss from imperfect installation, forfeited utility rebates, and missing documentation at resale, the savings typically disappear within a few years in San Bernardino’s cooling-dominated climate.
You can, but you shouldn’t. DIY spray foam kits lack the ratio control and temperature management of professional equipment, and self-installed foam carries no manufacturer warranty and typically fails California’s thermal-barrier requirements. Removal of failed DIY foam frequently costs more than the original professional installation would have.
California’s Title 24 standard for attics in climate zones 10 and 11, which include San Bernardino, is R-38 minimum for new work and major renovations. Existing homes can often get meaningful improvement with less, but R-38 is the target for anyone asking what “done right” looks like. The right material from brands like Owens Corning, Johns Manville, or GreenFiber depends on your attic’s specific conditions.
It can. California disclosure requirements ask about insulation type and installation. Undocumented, poorly installed DIY insulation becomes a negotiation point against you at sale. Professionally installed, documented insulation with a manufacturer’s warranty is a selling point, particularly in a market where buyers are increasingly energy-conscious.
Yes, and this is an underutilized option. Clearing the attic, removing old batt material yourself, and sealing visible gaps around penetrations are all reasonable DIY tasks. The technical installation, material selection, and air-sealing strategy should come from an insulation specialist. Call (855) 341-7856 to discuss what prep work makes sense for your home.
The Bottom Line
The DIY vs. professional insulation decision isn’t really about upfront cost, not in San Bernardino, where the stakes of getting it wrong compound through 100-degree summers, Title 24 requirements, and resale disclosures. The genuinely DIY-appropriate tasks are narrow: add unfaced batts over existing material, seal visible penetrations, weatherstrip the hatch. Everything else, spray foam, air sealing, wall retrofits, removal, vapor barrier decisions, carries liability that outweighs the labor savings. The smartest path for most San Bernardino homeowners is a hybrid: do the prep work yourself, then let a specialist handle the technical installation with the right material from an authorized brand. Your home holds the temperature you set. That’s the point of insulation, and it only works when the installation is done right.
Written by the team at Comfort Zone Insulation Co, serving San Bernardino since 2012.