
Last updated October 30, 2026
Spray Foam Insulation Maintenance Checklist for San Bernardino Homeowners
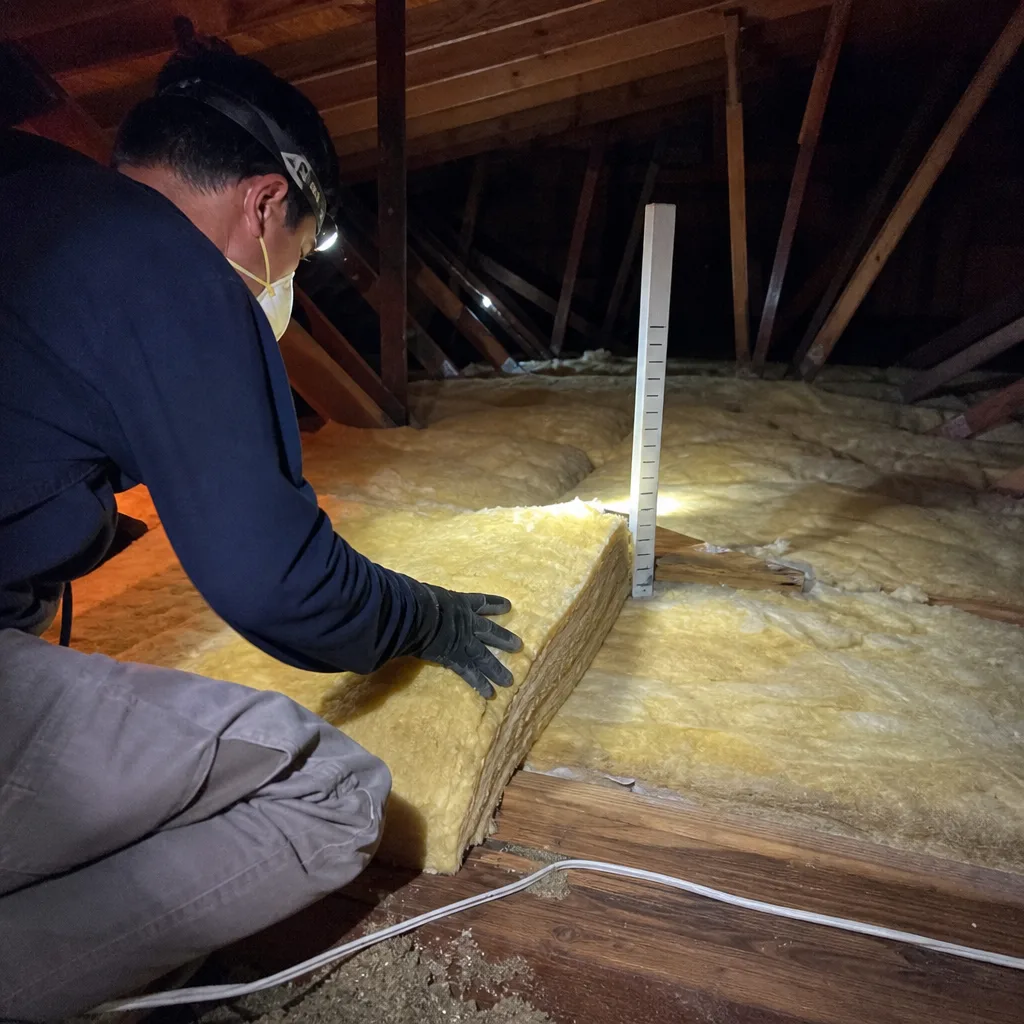
Closed-cell spray foam can easily last 50 years or more – but only if the five specific threats that exist in the Inland Empire get caught early. UV intensity here is brutal on exposed foam, our seismic activity stresses every foam-to-framing bond, and the pest pressure in San Bernardino is different from what coastal markets deal with. This guide gives you a field-tested maintenance protocol we use on our own installations, organized by season and threat level. By the time you finish, you’ll know exactly what to look at, how often to look, and which findings are cosmetic versus structural.
Quick Answer
Our Spray Foam Insulation services in San Bernardino should be inspected twice a year – once in spring and once in fall – with checks focused on UV exposure, separation at framing joints, pest entry points, and any changes in indoor odor. Most issues take under 15 minutes to identify and cost far less to correct early than to replace later.
Table of Contents
- The San Bernardino Vulnerability Map: Why Foam Here Needs Different Care
- Spring Maintenance Checklist (6 Steps)
- Fall Maintenance Checklist (6 Steps)
- UV Degradation Check: The 18-Month Warning Sign
- Seismic Inspection Points: What to Examine After a Quake
- Pest and Rodent Protocol for the Inland Empire
- HVAC Interaction Check: When Duct Work Changes Everything
- The Smell Test: Off-Gassing vs. Normal Cure
- Common Mistakes to Avoid
- When to Call a Professional
- Frequently Asked Questions
- The Bottom Line
The San Bernardino Vulnerability Map: Why Foam Here Needs Different Care
Spray foam performs differently in San Bernardino than it does in, say, San Diego or Santa Barbara. The reasons come down to physics. Our high-desert-adjacent climate means intense UV radiation, wide temperature swings between day and night, and a dry-air environment that accelerates certain types of material stress. Add in the San Jacinto and San Andreas fault systems nearby, plus rodent and termite pressure that inland communities consistently rank higher for than coastal ones, and you have a specific set of degradation pathways that a generic online guide won’t tell you about.
Most spray foam failures we’ve seen in San Bernardino homes over the years trace back to one of five causes covered in our Spray Foam Insulation Troubleshooting: Common Problems and How to Fix Them: UV exposure on exposed foam, separation at framing interfaces after seismic events, pest tunneling at the foundation line, moisture intrusion from roof or plumbing leaks, and improper original installation that only reveals itself years later. The maintenance protocol below addresses each of these in turn.
A well-installed spray foam job from brands like Icynene or Demilec should hold up for decades with minimal intervention. But “minimal” doesn’t mean “none.” The checks below are designed for a homeowner to perform in under an hour, twice a year, with zero specialized equipment.
Key Takeaways: Why This Matters
- San Bernardino’s UV index averages 8-9 in summer – among the highest in California – and exposed spray foam chalks visibly within 18 months of installation.
- Seismic activity along the San Jacinto fault zone can create hairline separation at foam-to-wood interfaces even when no visible structural damage occurs.
- Rodent pressure inland is measurably higher than in coastal markets because our arid landscape drives burrowing species toward irrigated residential areas.
- Most spray foam degradation is silent, incremental, and catches homeowners by surprise only when an energy bill spikes or a room suddenly loses thermal consistency.
- Twice-yearly inspections take about 45 minutes and catch 80% of problems before they require professional intervention.
Spring Maintenance Checklist (6 Steps)
Spring in San Bernardino means the start of our punishing solar season. April through October, exposed foam surfaces take a daily UV hit that many other regions never experience. This spring checklist targets the damage that winter rains and the transition into summer heat create. Do this in March or early April, before temperatures consistently exceed 85°F.
1. Exposed Foam Survey
Walk the perimeter of your home and look at every place foam might be visible. This includes rim joists in crawl spaces, any foam that extends past wall sheathing, and garage ceiling corners. Check for surface chalking (a powdery white residue that rubs off on your finger), yellowing, or a brittle, crackled appearance. Chalking is the first stage of UV degradation and is reversible if caught early.
2. Roof Deck Inspection from the Attic
If you have an unvented attic with spray foam on the roofline, go up with a flashlight and scan the underside of the deck for any dark staining, which indicates moisture penetration from a roof leak. Pay particular attention to areas around vents, chimneys, and roof penetrations. San Bernardino’s infrequent but intense winter rains can expose roof vulnerabilities that stay hidden until the foam traps the moisture against the sheathing.
3. Expansion Joint Check
Spray foam expands and contracts with temperature swings, and our diurnal range in the Inland Empire can exceed 40°F in spring. Look at foam-to-wood transitions around window and door frames, at the top plate line in unfinished basement areas, and at any interior corner joint. Hairline cracks smaller than 1/16″ are normal. Anything wider – or any gap where you can slide a business card in – warrants a professional look.
4. Pest Activity Sweep
Rodent activity peaks in spring as temperatures warm and breeding cycles accelerate. Look for gnaw marks on foam surfaces, small tunnels along the underside of floor joist insulation, and droppings near foundation vents. San Bernardino’s mix of newer suburban development adjacent to open foothill terrain makes rodent ingress a year-round concern, but spring is when we see the most new activity each year.
5. HVAC Filter and Duct Check
Your furnace filter picks up any foam particulate or fiberglass shedding that might indicate insulation breakdown inside your air handler cabinet. A suddenly dirty filter or visible foam dust around supply registers suggests something is degrading and circulating. Change the filter, then check again in two weeks if you saw anything unusual.
6. Odor Baseline Test
Stand in a closed room for 60 seconds, then walk outside and back in. Your nose resets quickly. Now breathe normally for 30 seconds. Any chemical or “new foam” smell that should have faded years ago is a signal to investigate further. We’ll cover this in more depth in the off-gassing section below, but spring is the right time to establish your baseline before summer heat intensifies any latent odor.
Fall Maintenance Checklist (6 Steps)
Fall is the second inspection point on the San Bernardino calendar. By late October, the worst heat has passed and the Santa Ana winds have begun. This checklist catches issues left over from the summer solar season and helps prepare the home for winter – which in San Bernardino means occasional near-freezing nights and periodic heavy rain.
1. Post-Summer UV Assessment
Summer UV in San Bernardino is the single biggest environmental stressor on exposed spray foam anywhere in California. Compare the appearance of any exterior-visible foam against your spring notes. If you didn’t do a spring check, look for a chalky surface, reddening or darkening of the foam’s color, and any area where the foam surface feels powdery rather than smooth. These are signs the foam’s protective outer layer is degrading.
2. Rain-Ready Rim Joist Check
Before winter rain arrives, inspect the rim joist area in any crawl space or basement. Look for water staining on the concrete foundation wall below the rim joist, which indicates water is tracking down past the foam seal. Also check for any foam that has pulled away from the sill plate. Rim joists are the most common location for air leakage in San Bernardino homes, and foam separation here negates the air-sealing benefit that motivated the installation in the first place.
3. Santa Ana Wind Draft Test
On a day with any wind, walk the interior perimeter of your home with a piece of incense or a thin piece of tissue paper. Hold it near outlets, window trims, baseboards, and ceiling light fixtures. If smoke wavers or the tissue flutters, you’ve found an air leak. Spray foam should eliminate most of these, but settling, seasonal movement, or missed spots from the original installation can all create small openings that carry cold winter air into the conditioned space.
4. Attic Hatch and Access Seal
The attic access hatch is one of the most frequently overlooked insulation weak points in San Bernardino homes. Check the weatherstripping or foam seal around the hatch or pull-down stair. If the home has spray foam on the attic floor rather than the roofline, the hatch seal is doing the work of an exterior door and should be treated accordingly. Gaps here create a direct chimney effect that pulls conditioned air out of the house in winter.
5. Duct Sealing Recheck
If your ducts run through unconditioned space – which is common in older San Bernardino ranch-style homes – check the exterior duct insulation and any spray foam mastic joints for cracks or separation. Temperature swings between day and night cause duct metal to expand and contract, and over a decade or two, this can weaken sealed joints. A joint that separates even slightly costs you heated air in winter and cooled air in summer.
6. Pest Entry Assessment Before Rodent Season
Rodent pressure increases in fall as temperatures drop and food sources shift. Check the foundation perimeter for any gap wider than 1/4 inch, especially around utility penetrations, gas lines, and AC refrigerant lines. Spray foam is often used as a pest-exclusion material at these penetration points, and if it’s been gnawed or degraded, now is the time to repair it – before rodents establish winter nesting inside wall cavities and larger problems develop.
UV Degradation Check: The 18-Month Warning Sign
Most homeowners in San Bernardino are never told that the spray foam inside their walls will outlast any foam left exposed to daylight by a factor of five or more. The chemistry is simple: UV light from the sun breaks down the polymer bonds in polyurethane foam, causing the surface to chalk, crack, and eventually lose density. In our specific solar environment, with clear skies for more than 280 days per year, unprotected foam starts showing visible degradation in as little as 18 months.
Where does exposed foam show up in San Bernardino homes? Four places account for nearly every case we see:
- Rim joists in vented crawl spaces – if your crawl space has open vents, direct sunlight can reach the foam installed at the sill plate.
- Garage ceilings and overhangs – foam applied to the underside of a carport or garage ceiling where the roof line doesn’t fully shade the application zone.
- Exterior wall transitions – foam that extrudes slightly past the sheathing at the building envelope edge, especially on south- and west-facing walls that get the full afternoon sun in San Bernardino.
- Unfinished basement or cellar openings – foam around windows, doors, or pipe penetrations where interior space is exposed to light through glazing.
How to Identify UV Damage Before It Becomes Structural
- Run your finger across the foam surface. If a fine powder comes off on your fingertip, that’s chalking – the polymer surface is degrading.
- Observe the color. Fresh polyurethane foam is cream, white, or pale yellow. UV-damaged foam turns progressively darker: tan, then orange-brown, then a burnt caramel color.
- Press the surface with a fingernail. Healthy cured foam has a slight flex and returns to shape. UV-degraded foam feels brittle and may crack or crumble with light pressure.
- Look for crack patterns. Surface checking creates a fine web of small cracks that resemble cracked desert mud – a pattern we recognize immediately in the Inland Empire because it mirrors our dry, sun-baked soil.
If you catch UV damage at the chalking stage, the fix is straightforward: a professional can scrape the degraded surface layer and apply a protective coating or re-skin the affected area. Left unchecked for another season, the damage progresses deeper into the foam, and the only repair is cutting out and replacing the affected section. In San Bernardino’s solar conditions, the window between “reversible” and “replace” can be under two years.
If your home needs a UV-damage assessment or you want a quote on protective coatings for exposed foam, our Spray Foam Insulation in San Bernardino team is available for site visits.
Seismic Inspection Points: What to Examine After a Quake
San Bernardino sits on the most seismically active region in Southern California. The San Andreas Fault runs through the Cajon Pass just north of the city, the San Jacinto Fault passes through the eastern side of the metro area, and the region experiences hundreds of small to moderate events each year that most residents don’t even consciously register. But those small shakes add up, and spray foam’s rigid structure means it doesn’t flex and recover the way fiberglass or cellulose would.
After any event you can feel – a 3.0 or stronger, or any prolonged shaking – check these specific foam-to-framing interfaces:
- Rim joist to sill plate connections – this is the highest-stress point in the building envelope during lateral movement. Look for hairline separation where the foam meets the wood.
- Top plate to roof truss or rafter transitions – in an unvented attic with foam on the roofline, check the wall-to-roof connection line for any foam cracking.
- Window and door header junctures – rigid foam does not absorb frame racking, so pressure transfers to corner transitions where the foam is thinnest.
- Cantilevered floor sections – any overhang or bump-out in the building’s geometry creates a natural stress concentration point during ground movement.
What Separation Actually Looks Like
You’re looking for a gap between the foam and the structural member it was applied to. A hairline crack that follows the wood grain is usually cosmetic. A gap wide enough to slide a credit card into is a real finding. In the worst cases, you’ll hear a creaking or popping sound from the wall cavity when you press on the drywall – that’s foam that has fully separated from the framing and is now sliding slightly with pressure.
We want to be clear about one thing: spray foam is not a structural element of your house, and foam separation after an earthquake does not mean your home is in danger. What it does mean is that air sealing has been compromised, and the thermal performance of the building envelope is reduced. The fix is typically localized repair around the affected seams, not full replacement. But left unaddressed, small separations allow air movement that can eventually widen the gap and reduce the insulation’s effectiveness in that area by 20-40%.
The same seismic forces apply to any insulation installed in wall cavities or attics. If your home has Attic Insulation in San Bernardino of any type, the roofline-to-wall interface deserves the same post-quake look.
Pest and Rodent Protocol for the Inland Empire
Here’s a fact most homeowners in San Bernardino learn too late: rodents in the Inland Empire gnaw on spray foam at a measurably higher rate than rodents in coastal Southern California. The reason has nothing to do with the foam and everything to do with climate. Our arid, heat-heavy environment drives rats and mice toward any cool, dark, stable thermal zone – which is exactly what a foam-insulated wall cavity provides. Add in the open foothill habitat that surrounds much of the city, and the pest pressure is simply higher here.
The good news is that spray foam itself is not a food source. Rodents don’t eat it for nutrition. They tunnel through it for passage and nesting. This means the most effective maintenance approach is prevention at the entry point.
Inland Empire Pest Inspection Protocol
- Walk the foundation perimeter monthly during spring and fall. Look for any gap between soil and siding, around pipes, under AC pads, or at vents. Rodents can compress through openings as small as 1/2 inch.
- Check all utility penetrations. Gas lines, water pipes, electrical conduit, cable lines, and AC line sets all pass through the envelope. Foam is often used to seal these openings, and this is where degradation matters most. Run your finger around the seal on each side of every penetration and feel for gaps or missing sections.
- Look for droppings in the crawl space or attic. Rat droppings are 1/2-3/4 inch with blunt ends. Mouse droppings are 1/8-1/4 inch with pointed ends. Fresh droppings look dark and shiny. Old droppings look gray and crumbly.
- Examine foam surfaces for chew marks. Look for rounded gnaw patterns at edges, small foam particles on the floor or sill plate beneath the area, and any tunnel that appears to enter the foam at a downward angle.
- Check the garage door seal and threshold. This is the single most common rodent entry point we see in San Bernardino homes, and it has nothing to do with foam – but once a rodent gets in the garage, foam-sealed walls and rim joists become its highway into the house.
If you find evidence of pest activity, the fix is two-part: eliminate the entry point and repair the damaged foam. Repairing foam without eliminating the entry point just gives the rodent a project for the next night. We recommend a copper mesh or steel wool backer inside any penetration that shows repeated gnawing, covered with new foam on top. The metal prevents rodents from chewing through, and the foam restores the air and thermal seal.
One more thought on pests: if you’re considering new insulation and pest resistance is a primary concern, blown-in cellulose from brands like GreenFiber is treated with borate compounds that deter insects and rodents naturally. Our Blown In Insulation in San Bernardino options may be worth reviewing if pest pressure has been a recurring theme in your home.
HVAC Interaction Check: When Duct Work Changes Everything
Here’s a maintenance scenario most guides completely miss: spray foam insulation and your HVAC system are mechanically linked. When one changes, the other’s performance changes with it. This is especially true in San Bernardino, where air conditioners run for 6-8 months per year and the thermal load on the building envelope is substantial.
Spray foam dramatically reduces air infiltration. A properly sealed foam home might drop from 4-6 air changes per hour (typical for an older, leaky San Bernardino ranch) to 0.2-0.5 air changes per hour. That’s a 90% reduction. When a home is that tight, the HVAC system becomes the primary source of fresh air exchange and the dominant force controlling indoor air pressure dynamics.
Here’s what changes when foam is installed, why it matters, and what to watch for:
- Duct leakage becomes more consequential. In a leaky house, a 15% duct leak is a small efficiency loss. In a tightly sealed foam house, that same duct leak creates negative pressure in the conditioned space, which can pull hot attic air down through any remaining assembly gaps (recessed lights, electrical boxes, attic hatch) and make rooms feel warmer than they should be.
- HVAC upsizing or replacement changes static pressure. If you replace a 3-ton AC with a 4-ton unit but keep the same ductwork, the higher air velocity creates different pressure balance in every room. In a foam-sealed home, this effect is amplified because there are no incidental air leaks to release the pressure. The result is often uneven temperatures that feel like an insulation failure but are actually an airflow problem.
- Supply and return balance shifts. Closing doors in a foam-sealed house – even slightly ajar – can pressurize a room and force air down walls or through the floor. This is why foam homes sometimes develop “ghost drafts” that don’t match any known leak. Air pressure is finding the path of least resistance, and in a tight house, that path might be through an electrical outlet or a baseboard gap.
What to check after any HVAC work or duct modification: note the temperature in each room at the same time of day for a week, listening for any whooshing sound through outlets, and examining the supply and return grilles for dust streaks that indicate air being pulled around them rather than through them. Any of these findings suggests an air pressure imbalance that a professional can correct with duct sealing or pressure balancing work.
The Smell Test: Off-Gassing vs. Normal Cure
Spray foam cures through a chemical reaction between two components – an isocyanate (often MDI) and a polyol resin blend. During proper installation and the first 24-48 hours after application, the foam releases trace amounts of unreacted chemicals as the reaction completes. This is normal, and most manufacturers recommend leaving the home unoccupied for 24 hours after application.
But what happens when an older installation starts smelling again – or when the initial odor never fully fades? Here’s how to interpret what you’re smelling in San Bernardino’s climate, where summer attic temperatures can reach 150°F and accelerate any chemical process inside the building envelope.
What’s Normal
Within the first week of installation: a faint chemical or “fresh plastic” odor, most noticeable in the room directly adjacent to the application area. This should fade steadily and be undetectable to all but the most sensitive noses within two to four weeks.
What’s a Red Flag
- Odor that returns seasonally. If the smell appears or intensifies when outside temperatures rise above 95°F, the foam may have residual unreacted components that only volatilize when the material gets hot. In San Bernardino, this typically first shows up in July or August when the attic or wall cavity reaches peak temperature.
- Fishy or ammonia-like smell. This indicates the foam was mixed off-ratio during installation – too much isocyanate or polyol. Off-ratio foam never fully cures, and the smell never resolves on its own.
- “Burnt plastic” after several years. This can indicate thermal degradation at a specific location – often where foam was installed too close to a heat source like a flue pipe, recessed light housing, or chimney chase.
- Persistent odor from day one that never faded. If you can still smell foam six months after installation, something was wrong with the original application, and the only complete fix is removing and replacing the affected foam.
The important distinction is between an occasional, faint reminder of the foam’s chemistry and a persistent, noticeable odor in living spaces. The first is probably harmless and will continue to fade. The second deserves professional testing. Air quality testing for isocyanates is specific and different from standard VOC testing – ask for the right test, not the cheapest one.
If you’ve been living with an odor issue for months and are weighing whether to live with it or call someone, call first. The free estimate from a qualified inspector will tell you quickly whether you’re dealing with a cosmetic concern or a material problem. Our team at Comfort Zone Insulation Co home covers spray foam inspection, diagnosis, and replacement if it comes to that.
Common Mistakes to Avoid
- Waiting to check until you notice a problem. By the time you feel a draft, see a utility bill spike, or smell an odor, the underlying issue has likely been developing for months. Twice-yearly checks catch things before they become noticeable – and that’s the entire point of this protocol.
- Assuming spray foam means zero maintenance. The foam itself is durable, but its performance depends on the surfaces around it remaining intact. UV exposure, seismic shifts, and pest activity all act on foam indirectly, and ignoring those forces means ignoring real degradation pathways.
- Painting over UV-damaged foam without addressing the surface first. Applying paint or a coating over chalked, degraded foam doesn’t stop the degradation – it just seals it in. The damaged surface layer needs to be scraped or re-skinned first, then coated. A professional will know the correct preparation sequence.
- Plugging every possible air leak with expanding foam from a hardware store can. Single-component foam cans (the kind from home improvement stores) are not the same material as professionally applied two-component spray foam. Using the wrong product on a structural seal point – like a rim joist – creates a weak point that will fail early. We see this specifically in San Bernardino garages where well-meaning DIYers seal around a water heater flue and then the foam shrinks or cracks within a year.
- Skipping the pest check because you’ve “never seen a rat.” Rodents are nocturnal and astonishingly quiet. Absence of a sighting is not evidence of absence. The perimeter check takes ten minutes and will show you evidence long before a rodent makes its presence known inside the living space.
- Ignoring small cracks as “settling” when they may be seismic. In San Bernardino specifically, small crack development at the top plate or rim joist should always be considered in the context of recent seismic activity. If cracks appear after a quake, they indicate the foam has separated from framing. That’s not settling – that’s seismic shear, and it’s worth a professional look.
- Using attic or crawl space insulation status as a reason to avoid HVAC filter changes. Foam reduces airborne particles from outside, but the inside environment still generates particulates from cooking, pets, and household activities. A clogged filter in a foam-sealed home increases static pressure and reduces airflow in exactly the way that makes a tight house feel stuffy and unevenly cooled. The fix is a $15 filter, not a foam problem.
When to Call a Professional
Most of what we’ve covered in this guide is within a careful homeowner’s capability, and you’ll find more guides & resources on our blog. But certain findings warrant a professional look, either because they indicate a larger underlying problem or because the fix requires specialized equipment and material knowledge.
Call a professional if you find: a gap wide enough to slide a credit card into at any foam-to-wood interface; persistent odor that hasn’t faded within six months of installation or that returns seasonally; any evidence of moisture staining on or behind the foam; visible insect galleries or rodent tunneling into the foam body; foam that crumbles or flakes when pressed; or any area where the surface has darkened to brown or black and extends more than a quarter inch deep. These are all signs that the foam’s integrity has been compromised beyond what a coating or simple repair will solve.
Comfort Zone Insulation Co offers free estimates in San Bernardino – call (855) 341-7856 to schedule an inspection. We install insulation and nothing else, so the person who shows up at your door is a foam specialist, not a generalist checking a box on a list. Our team has been serving San Bernardino homeowners since 2012, and if your foam is fine, we’ll tell you it’s fine.
Frequently Asked Questions
Twice a year – once in spring before the solar season begins and once in fall as temperatures cool and winter rains approach. Each inspection takes about 45 minutes using this guide’s checklists. Homes with significant exposed foam or known pest pressure may benefit from quarterly perimeter checks.
Closed-cell spray foam from quality manufacturers like Icynene or Demilec can last 50 years or longer when protected from UV exposure, kept dry, and not subjected to pest damage. The foam itself doesn’t degrade meaningfully under normal conditions – it’s the environmental factors acting on the foam that create the need for maintenance.
UV damage appears first as surface chalking (a fine powdery residue), then as yellowing that progresses to orange-brown, then as a crackled or brittle surface texture. In San Bernardino’s solar environment, these changes can appear within 18 months of exposure. Catching it at the chalking stage usually means a simple surface treatment rather than section replacement.
Spray foam does not attract rodents as a food source, but it can be tunneled through for nesting if pest activity already exists in the area. The arid Inland Empire climate leads to more determined rodent activity than coastal areas, so perimeter checks and penetration sealing are higher priorities here. Copper mesh backers inside foam-sealed penetrations are an effective deterrent.
A recurring chemical odor during high heat suggests unreacted components in the foam that only volatilize at elevated temperatures. This typically indicates an off-ratio mixing issue during the original installation. In San Bernardino’s summer, where attic temperatures exceed 140°F, this pattern becomes particularly noticeable. Persistent or returning odor should be professionally assessed, as off-ratio foam won’t fully cure on its own.
Most maintenance checks are free if you do them yourself. Professional inspections run $100-$300 depending on the size and complexity of the home, and many companies apply this fee toward repairs if work is needed. Small localized repairs (UV spot treatment, penetration resealing, minor crack filling) typically run $200-$600. Full section replacement is the only expensive outcome and is almost always avoidable with twice-yearly inspections. Call (855) 341-7856 for an exact quote for your San Bernardino home – estimates are free.
The Bottom Line
Spray foam insulation in San Bernardino is not maintenance-free, but it is low-maintenance when you have a specific protocol to follow. UV degradation from our intense solar environment, seismic separation from our fault lines, and pest pressure from our arid foothill-adjacent neighborhoods all create predictable, identifiable issues that can be caught early. The investment is small: two 45-minute inspections per year, a careful eye on exposed foam surfaces, and a willingness to act on hairline findings before they become structural ones. A properly maintained spray foam installation will hold temperature, keep energy costs predictable, and serve the house for decades. That’s the whole point of the material – a home that holds the temperature you set, year after year, in every San Bernardino neighborhood from Verdemont to Loma Linda.
Written by the team at Comfort Zone Insulation Co, serving San Bernardino since 2012.